
What is a Microsoft Exchange server?
Microsoft Exchange Server is an overall email server by Microsoft. this is a piece of software that manages all emails. It includes all other addons like calendar, notes, etc.
This takes data from the Users and sends It to a computer acting as a server. this software doesn’t work on any other server than Windows. so in this blog, we will See Microsoft Exchange Server Installation.
Some Of the features of Exchange server 2019 are:-
- Meta Cache Database (MCDB): This is for those who have their own physical hard drives (SSDs) and want to store the data there it is for them.
- Dynamic Database Cache (DDC): DDC adapts the situation and allows the allocated storage capacity.
- Search index
- Windows Server Core
- Calendar extensions
- E-Mail Address Internationalization (EAI)
Minimum System requirement for installing:-
| Processor | 64-bit processors from Intel or AMD |
| Memory | 500 MB free space required for the Message Queue Database drive and 128 GB required for installation, 200 MB free space needed for the system drive. |
| Hard disk space | Required 20 GB for installation, 200 MB free space for the system drive and 500 MB free space for the Message Queue Database drive. |
| File system | NTFS |
| Screen | 1024 x 768 pixels (XGA) or higher |
Advantages Of Exchange Server 2019
- Easy to use.
- comes with many addons
- User friendly.
- Shared mailbox.
- Cost-effective.
- Integration with SharePoint and Skype for Business.
- eDiscovery
- Keep Your Data in One Place
- Active Email Protection
- Unified Contact Store
- User Photos
- Modern Public Folders
- Cloud- on your terms
Installation Steps
Step -1 Network Configuration
- Go to your windows settings and go ahead to network and adapter settings

- Now right-click on your Ethernet or Wifi network
- Next Click on properties.

- Next select your Internet Protocol Version.

- Now enter Your IP address. ( IP may be differ according toyour Organization Network)

- Now right-click on This PC.
- And click on properties.

- After that click on Change settings.

- Now click on Change.

- After that Give a Name to your PC and enter your Domain.

- Now Enter your account credentials.

- After clicking on OK click on Restart Now.

Step -2 Active Directory preparation.
- First Open Windows PowerShell

- Now enter the PowerShell Command: Install-WindowsFeature RSAT-ADDS
Install-WindowsFeature RSAT-ADDS
- Next you need to install visuall C++. So go ahead and download the software from Here: Download Visual C++ Redistributable Packages for Visual Studio 2013 from Official Microsoft Download Center

- Ok now click on File name to select all the files and click on next.

- After downloading the File Open it to install. Then click on “I agree terms and condition“. And click on install.

- Then this Software will be installed by clicking on the finish.
- Now Install Unified Communications Managed API (UCMA) 4.0 by downloading and clicking on next after opening it.
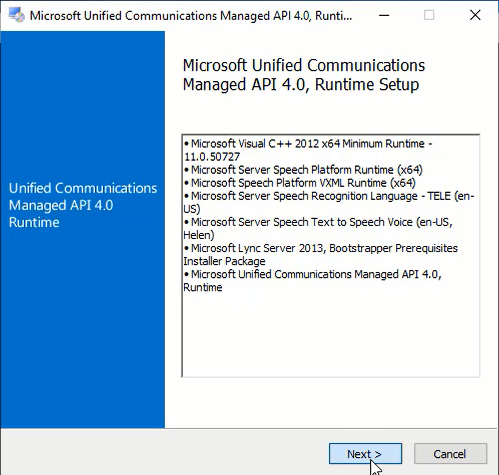
- Now click on finish to complete the installation.

- Next again open Windows PowerShell
- And type these commands
Install-WindowsFeature Server-Media-Foundation, NET-Framework-45-Features, RPC-over-HTTP-proxy, RSAT-Clustering, RSAT-Clustering-CmdInterface, RSAT-Clustering-Mgmt, RSAT-Clustering-PowerShell, WAS-Process-Model, Web-Asp-Net45, Web-Basic-Auth, Web-Client-Auth, Web-Digest-Auth, Web-Dir-Browsing, Web-Dyn-Compression, Web-Http-Errors, Web-Http-Logging, Web-Http-Redirect, Web-Http-Tracing, Web-ISAPI-Ext, Web-ISAPI-Filter, Web-Lgcy-Mgmt-Console, Web-Metabase, Web-Mgmt-Console, Web-Mgmt-Service, Web-Net-Ext45, Web-Request-Monitor, Web-Server, Web-Stat-Compression, Web-Static-Content, Web-Windows-Auth, Web-WMI, Windows-Identity-Foundation, RSAT-ADDS
Step-3 Prepare Active Directory and domains
- Open the Windows PowerShell and paste the following command and hit enter.
.\Setup.exe /IAcceptExchangeServerLicenseTerms /PrepareSchema
- Also again paste this Command and hit enter.
.\Setup.exe /IAcceptExchangeServerLicenseTerms /PrepareAD /OrganizationName: “Simitech”Note: In the Place of Simitech you paste your own Organization Name

- execute this Command again.
.\Setup.exe /IAcceptExchangeServerLicenseTerms /PrepareAllDomains- execute this Command Again.
.\Setup.exe /IAcceptExchangeServerLicenseTerms /PrepareDomain:SIMITECH
Note: In the Place of Simitech you paste your own Organization Name.
Step-4 Microsoft Exchange Server Installation
Now you need to Mount the Exchange 2019 Preview server in the organization, and if you have mounted that then you will See another drive for its ISO. If you don’t have the ISO Download from here Windows Server Free Trial | Microsoft. Now go to the files and at last, you will find a setup.exe file open that.

- Now click Next on the new window that have been appeared.

- Once you will click next the program will start to copy files to Local directories. Then it will initialize the setup.


- After that you will be fetched to a introduction page.
- Just click on Next for moving further.

- Next you will be landing on terms and condition page.
- Just click on I agree Terms and condition.
- And then click on Next

- Next, you will be On the page to choose the settings.
- Now we will go ahead with Use Recommended Settings. But you can always choose Don’t use Recommended Settings and use your own Settings.
Note: Only Choose Don’t use Recommended Settings if you know well about the settings.

- After that, you will be on the page of server role selection. Keep all things as default and click on Next.

- Now you can choose you installation directory. By default the allocated drive will be selected. And then Click on Next.

- Next, you will be on the page of malware scanning. Keep all the settings as default like by default the yes will be selected keep it and click on next.

- Now once the readiness check is 100% Click on next.

- Then Wait for some time to get the software installed. The time will depend on your hardware configuration.

- Next click on Finish to complete the setup.

Step-5 Review Microsoft Exchange Server Installation
The Exchange Administration Center (EAC) is a web-based management console for Microsoft Exchange Server 2019 Preview that allows for easy use and is designed for local, online, or hybrid Exchange deployments.
Navigate to Exchange Admin Center.
Just open your web browser and paste to this URL and hit enter:
https://localhost/ecp
Sign In with your credentials. And you will be on your admin center.

Here all the data security depends on you and your security. Microsoft only provides a malware scanning option. Other than that Microsoft is not responsible for your data security. The IMAP, pop3 and exchange protocols are supported by this server.
Moreover, it is used to synchronize the data among mail servers, either online or offline. It helps to separate the email contacts with the users’ computers, and mobile phones.
A mail server is a facility that deals with sending, receiving and processing emails. Microsoft Exchange Server 2019 is one of the mail servers developed and introduced by Microsoft.
The ultimate aim is to enhance the efficiency of business dealings by providing them with a platform to communicate with one another. It has more than 30 million users of its email services.
Exchange Server allows the user to exchange information and schedules. it’s used by businesses and organizations around the globe to host their email server and allow employees access to email messages from anywhere in the world.
Conclusion
Microsoft Exchange Server is an overall Email server by Microsoft. This is a piece of software that manages all emails. To install, configure and manage a Microsoft Exchange server, you need to have the proper technical knowledge and skill.
The exchange management system involves some complicated steps that require the administrator’s experience in the field of IT.
It was first released in 1993 s Microsoft Windows NT 3.51 and Windows for Workgroups 3.11 users are able to design simple e-mail pathways among each other using SMTP (Simple Mail Transfer Protocol), and the release of Exchange 5.0 expanded on this by supporting MAPI (Messaging Application Program Interface) in addition to SMTP, while also supporting mobile users through ActiveSync.
Many websites today are running on Microsoft Exchange Server, for better functionality and efficiency. The new Microsoft Exchange server is a mail server intended for small as well as large organizations.
In this article, we will talk about what Exchange Server is and how it works. Hope Microsoft Exchange Server Installation works well for you.
Thank You.
Check out this:-


